
Note: This post is part of a series. Each post builds on the previous ones. If you are just trying to add one thing to an existing system that was not built following this series, then I cannot promise that these instructions will work for you, although they probably will. If you’ve started from something other than a non-NOOBS Raspbian image, then you’ll probably need to adjust for that.
Please refer to the series Introduction for a list of all the different posts in the series.
Self-Promotion: I have recorded this series as a screencast for Pluralsight:
(http://www.pluralsight.com/courses/raspberry-pi-home-server)
If you have a Pluralsight subscription, please consider watching it. Reading the instructions is one thing, but watching it done demystifies the whole process.
Thank you!
Sync What?
SyncThing. It’s another cloud synchronization program, very much like Resilio Sync, which I covered earlier in the series. It’s a free and open-source project though, and offers most of the same functionality as Resilio Sync, although not as much a Resilio Sync with a Pro license.
I’m just putting it out there as an option, because it’s easily installed on the Raspberry Pi, and has clients available for just about any platform you’d care to run it on. I’m using it to mirror my public share to my CrashPi.
Note: Make sure you check out the Resilio Sync post in this series as well. Look at both options and decide which you like better. It seems that running both Resilio Sync and Syncthing at the same time works just fine, but you probably won’t need both.
Installing Syncthing
Syncthing has its own repository and signing key, similar to a few of the packages we’ve installed previously. Download and install the signing key like this.
wget -O - https://syncthing.net/release-key.txt | sudo apt-key add -Here, we’re downloading the key file from Syncthing’s own site, and installing it by piping it directly into apt-get with the “add” keyword. This key is required in order for apt-get to install any packages that it was used to sign.
Next, add the Syncthing repository to APT’s list of known sources by creating a new source list. As with previous examples, I’ll create a separate file rather than just tacking onto the main sources.list file.
sudo nano /etc/apt/sources.list.d/syncthing.list
Paste in the following
deb http://apt.syncthing.net/ syncthing releaseExit nano, saving your changes (Ctrl-X, Y).
Tell apt-get to update its list of repositories, and then install Syncthing
sudo apt-get update
sudo apt-get install syncthing
Now we’re ready to start configuring Syncthing. Start Syncthing from the command line.
syncthing
Configuring from a Local Browser
If your Pi is hooked up to a monitor, and you’re running the desktop, then a browser window should open automatically, and in a few moments, the Syncthing web UI will appear.
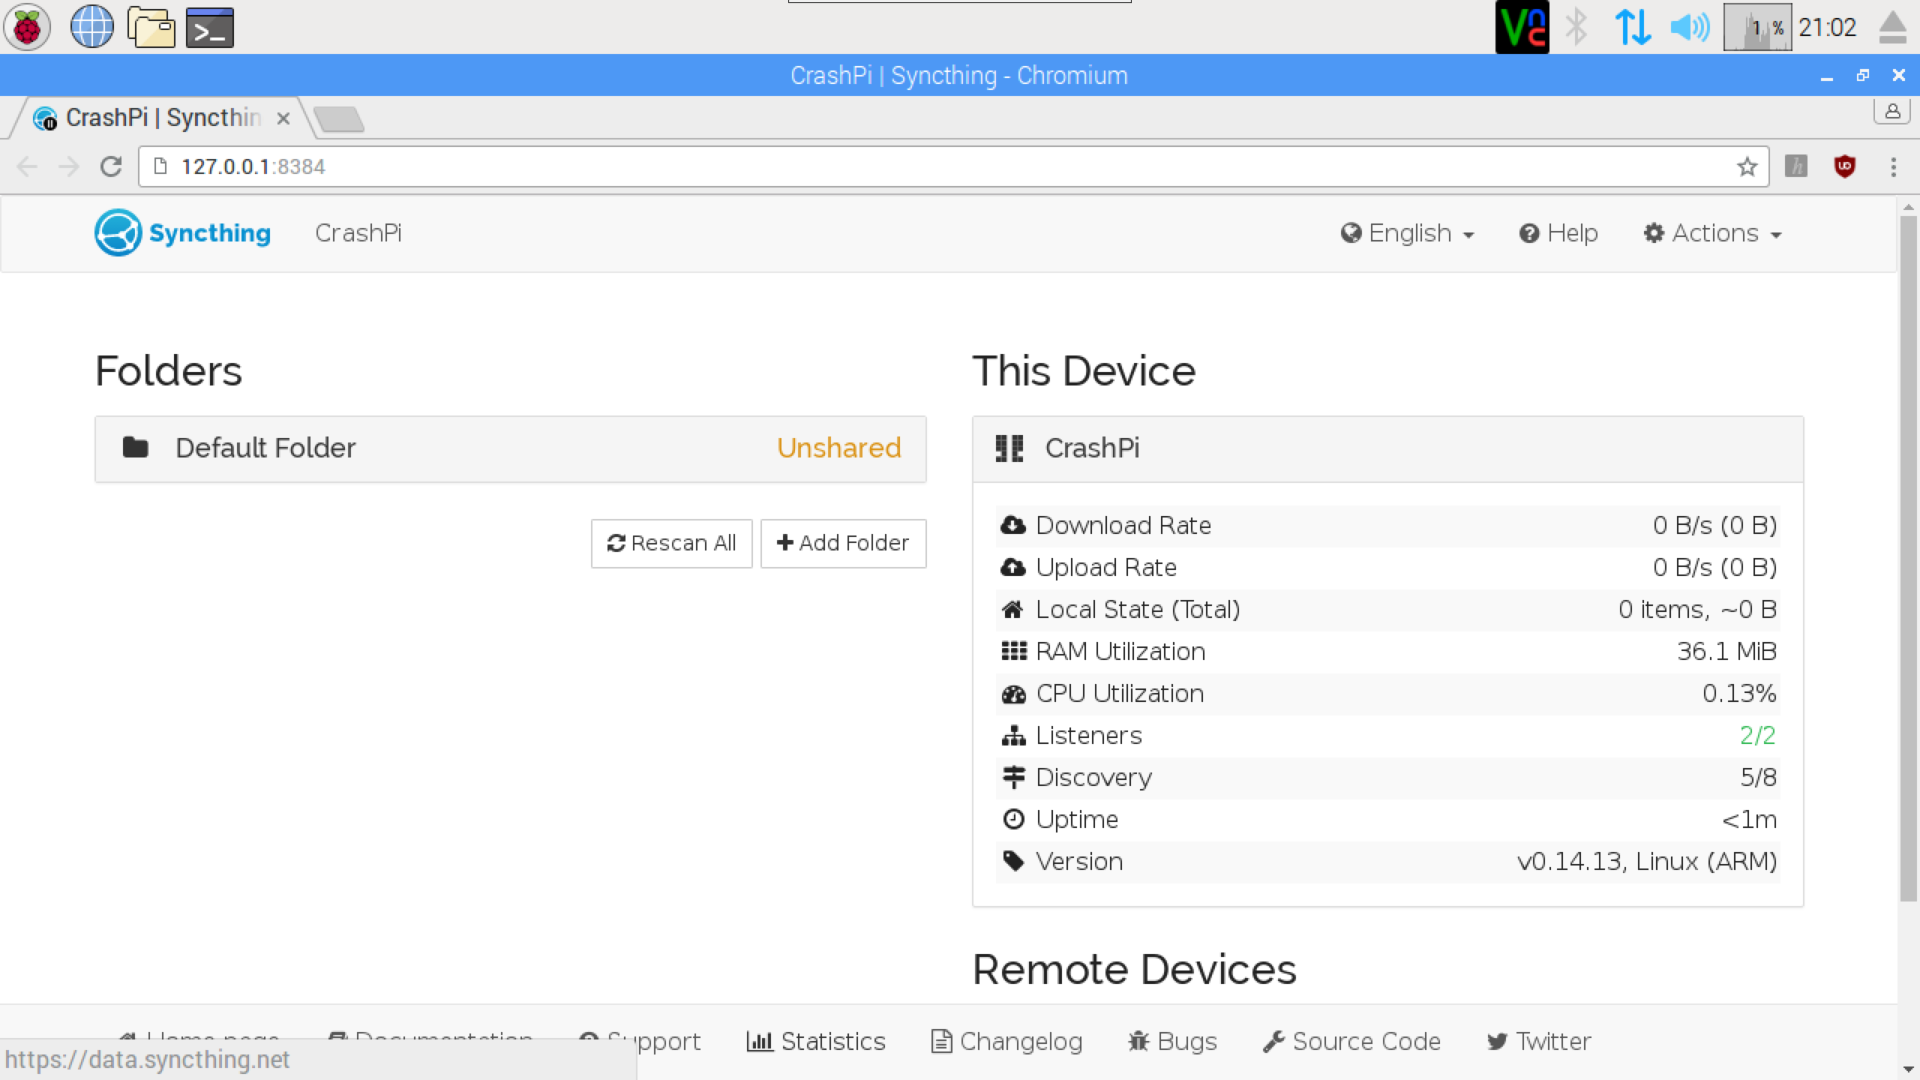
This web UI is very full-featured, and you’ll use it to set up folders that you want to sync between devices. I’ll show an example of that a little later on. The only problem is that the UI is only available from a local browser running on the same machine as Syncthing. If you don’t mind remoting in to make changes, then you can just skip ahead, but if you’re like me, you’d like to connect directly from the browser on your regular computer.
This is easy enough through the web UI. Click the “Actions” drop-down in the upper-right of the page, and then “Settings”.
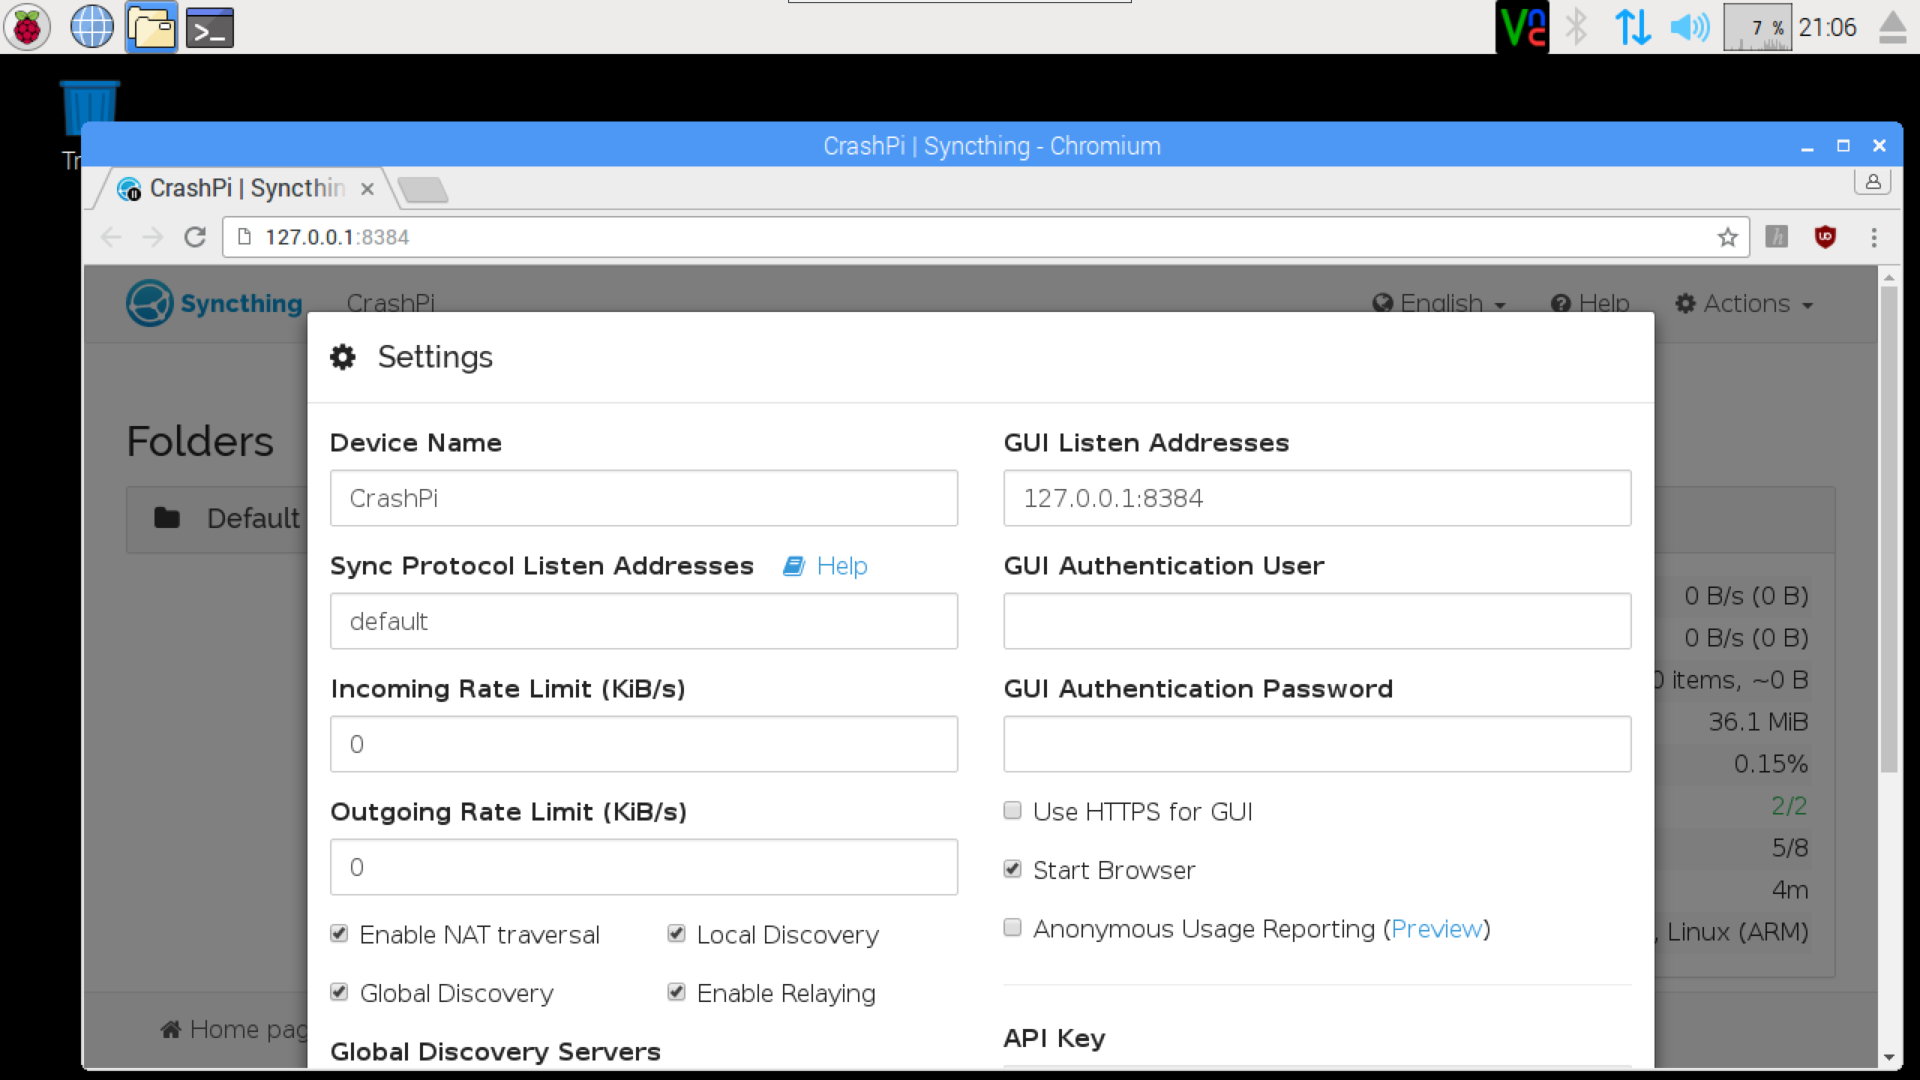
In the right-hand column, change the “GUI Listen Addresses” from “127.0.0.1:8384” to “0.0.0.0:8384”. This will allow Syncthing to be administered from other computers on your home network. We don’t want to leave it wide open to just anyone though, so fill in values for the “GUI Authentication User” and “GUI Authentication Password” as well. You can decide to make up an entirely different user name, or just use “pi” and its password. It’s up to you.
Configuring from a Remote Browser
If your Pi doesn’t boot to the desktop, or you’re doing this installation through a remote SSH session, then obviously the local browser is not going to be an option, but we can still make the required changes.
Now that Syncthing has been run once, it has created a config file where we can make the same adjustments. Press Ctrl-C in the terminal window to shut down Syncthing.
Open Syncthing’s config file using nano.
sudo nano ~/.config/syncthing/config.xml
Find the “gui” section. It should look something like this:
<gui enabled="true" tls="false" debugging="false">
    <address>127.0.0.1:8384</address>
    <apikey></apikey>
    <theme>default</theme>
</gui>
Change the “127.0.0.1:8384”, which refers to the local machine, in this case the Pi itself, to “0.0.0.0:8384”, which means any machine on the local network. Technically, you could forward a port through your firewall and make Syncthing accessible from outside your house as well, but there’s no reason to do that. If you set up a VPN as covered in my OpenVPN post, you can always connect securely to the Pi and make any changes you need from there.
Close nano, saving your changes (Ctrl-X, Y), and restart Syncthing from the command line.
syncthing
Give Syncthing a moment to get started up, and then open a browser from your regular computer. Connect to the Pi, port 8384. The web UI will open up, and after a few moments you can expect to see a warning that the web UI is now configured to allow remote access, but isn’t going to require a password.
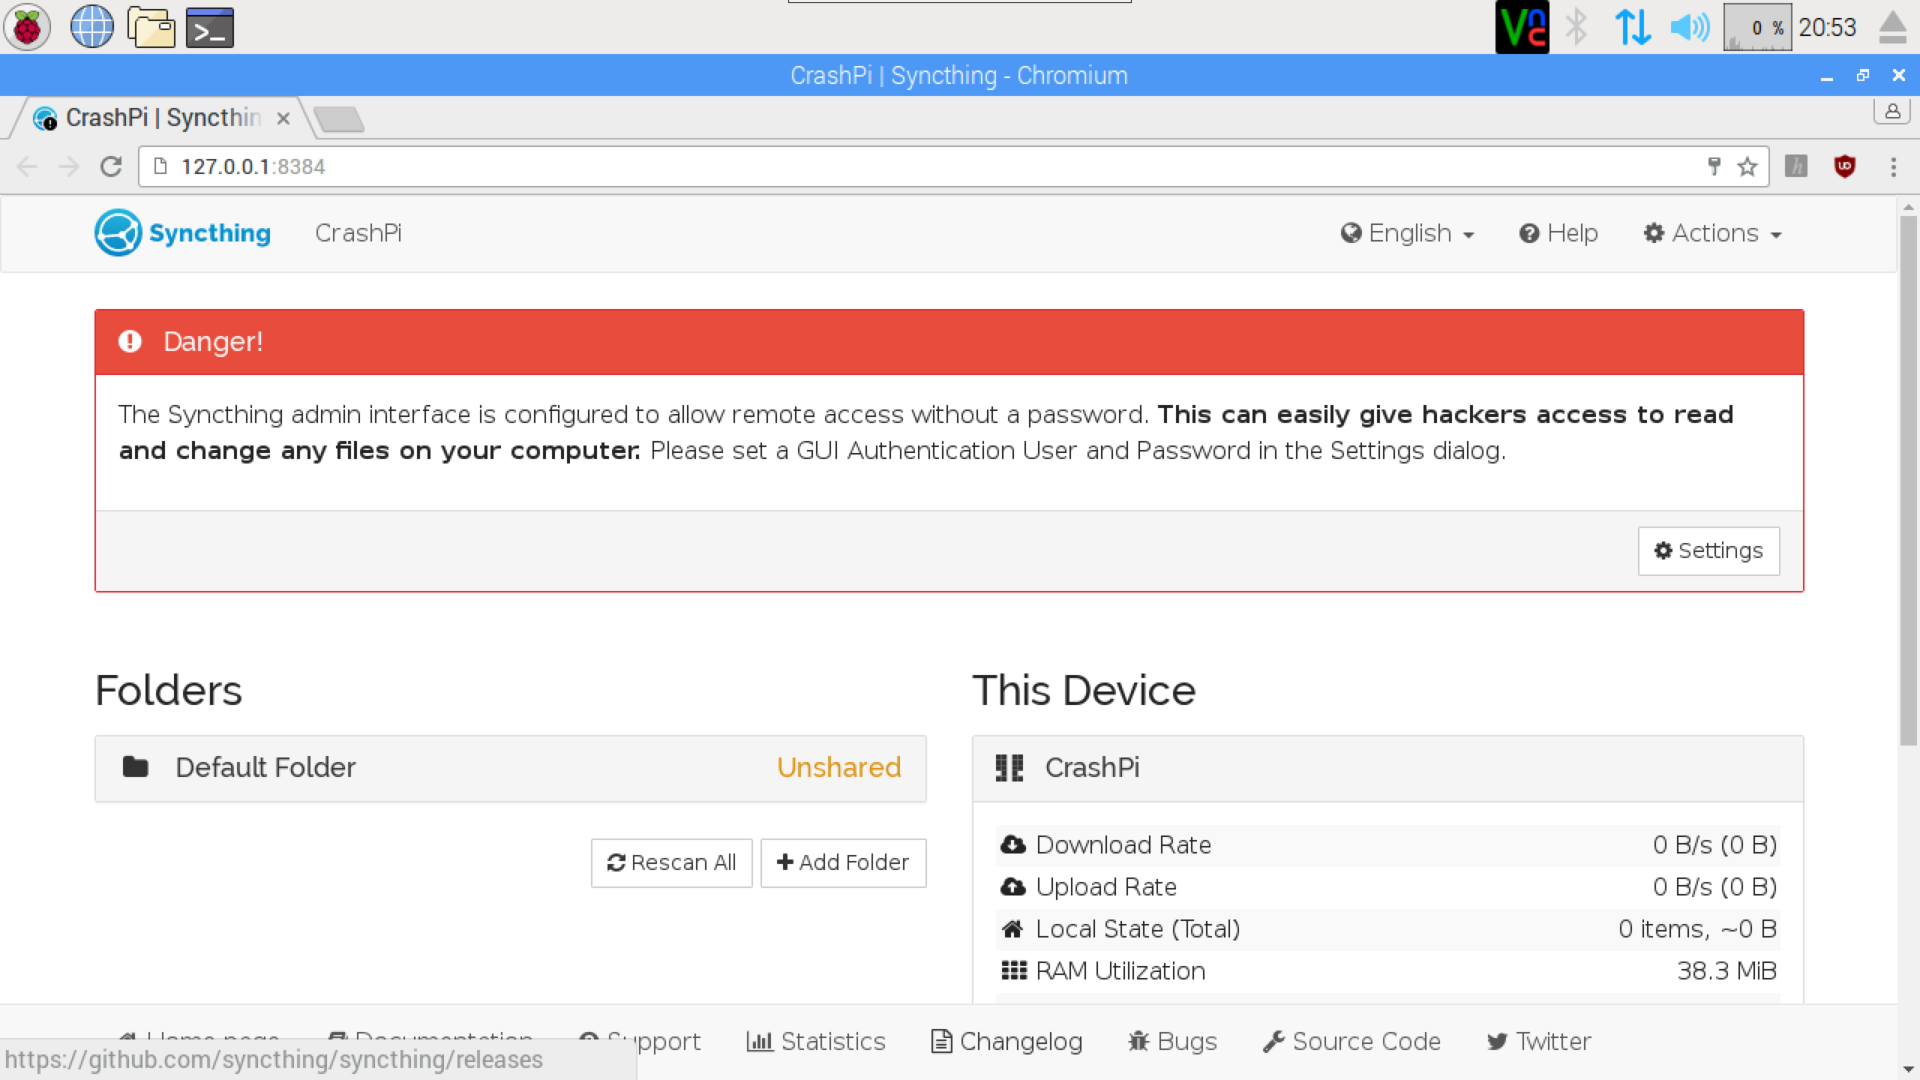
Click the “Settings” button, and fill in values for the “GUI Authentication User” and “GUI Authentication Password”. The same way as we did in the previous section. Click the Save button, and you’ll soon be prompter to re-authenticate with the name and password you just set up.
Sync some things
For a demonstration, I’ll be syncing a folder between two of my servers, my main Raspberry Pi Home Server, and my CrashPi (although sadly, CrashPlan isn’t working right now). By default, Syncthing already created a folder called “Sync” in the pi user’s home folder. Following the same directions above, I’ve installed Syncthing on my second server already, and it now has a similar default folder already created. All I need to do is introduce these two Syncthings to each other.
Click the Actions drop-down in the upper-right corner of the page again, and then “Show Id”. You’ll get a page with a QR code on it, as well as a text representation of this Syncthing’s “Device Id”. The QR code can be used by the mobile versions of Syncthing so that you can sync things to your phone. For now, copy the text above the QR code. Make sure you get the whole thing.
Switch to the Syncthing web UI running on the second device, and click the “Add Remote Device” button in the lower-left corner of the page. You may have to scroll a bit to see it. Paste the first Syncthing instance’s Device Id in the first field. Fill in a name so that you can keep track of which device is which, and then check the “Default Folder” checkbox at the bottom. Fincally, click “Save” to dismiss the dialog. There are a lot of other options here, but I’ll leave it up to you to explore Syncthing’s documentation on your own. Just click the “Help” button in the upper-right and you’re off.
Return to the web UI of the first Syncthing instance, and you should see a prompt asking you to confirm the addition of the second instance. This ensures that even if someone were to get ahold of your Device Id, they couldn’t just help themselves to your stuff. You need to give the okay first. Click “Add Device”, and you’ll see the same dialog that you were looking at a moment ago, but most of the fields will be filled in for you already. Check off the “Default Folder” checkbox again, and then click the Save button.
Finally, switch back to the other instance, and you’ll see another prompt asking you to confirm sharing the default folder.
Time to Test
Open a second Terminal window, SSH session, or simply use the file browser on the desktop to create a new file in the “Sync” folder that Syncthing created for you. Perhaps name it after the device on which it was created so we can keep track. Do the same on the other computer, and then observe what happens. If you’re lucky, the files will magically sync from one computer to the other. At the time I’m writing this, there’s some kind of bug when adding new folders, and you’ll need to go to the Actions drop-down and click “Restart” on both instances to get things flowing. After that though, the folders on each computer should stay in sync.
As with and file synchronization technology, it’s possible to have conflicts. If you edit the same file on both systems, or try to sync a file that receives regular changes from both places, things are going to get ugly. Rather than just clobbering what the other computer did, Syncthing will create “conflict” files, and leave it up to you to sort things out. This is good in that you won’t have one version simply overwriting another, but it does mean that you’ll have to be involved in fixing it when things go wrong.
Try to use Syncthing only for items that you want available everywhere, but will typically only make changes from one place at a time. Refer to Syncthing’s documentation for help with synchronization strategies.
Stopping Syncthing
Since we started Syncthing from the command line, that command line has been held up waiting for Syncthing to finish. You can press Ctrl-C in the terminal window to shut it down, or go to the Actions drop-down and click “Shutdown”. In either case, your command line will wake back up so you can issue more commands.
If you want to start Syncthing without locking up your command line, you can always append an ampersand (&) to the command to run it in the background.
syncthing &
Since you can’t hit Ctrl-C to stop it anymore, you’ll have to use the menu to shut down this instance if you want. Syncthing will also keep interjecting things into your terminal session, which can be annoying. This approach also means manually starting Syncthing every time you reboot, though.
Starting Syncthing automatically
Logging in and starting Syncthing manually isn’t going to work long-tern. Fortunately, Syncthing’s authors have done most of the hard work for you here. There’s already a service description set up and waiting for you. All you need to do is enable it and reboot.
sudo systemctl enable syncthing@pi.service
reboot
That’s it. When the pi reboots, Syncthing should be up and running as the “pi” user automatically.
At this point, I refer you to Syncthing’s documentation for more information on its configuration, care and feeding. It’s a very capable program, and I’ll be interested to watch its progress.
Troubleshooting
A couple days ago, I started having problems with my server. It would disappear from the network entirely. No SSH, no VPN, no VNC or even Samba. I had recently done a round of update/upgrade, so I figured something must be up with that. Looking at the logs, and the activity in htop, I saw a lot of entries about SyncThing, which I honestly haven’t really been using that much. I rebooted a few times in search of an answer, and noticed that after the server locked up on me again, SyncThing was responsible for the last entry in the syslog.
I don’t know that this means SyncThing is actually responsible, but disabling it made everything stable again. It could be that I simply had too many things running at once, and reducing the load made the difference. I’ll be keeping my eye on it, but for now, I thought it was worth tacking onto the post.

If I choose to use this as a backup for my other pi fileserver, do I need to transfer all data in the sync folder or can i do a copy beforehand that are exactly like the other site. So I don’t need to transfer over wifi or internet? is it the same with Resilio?
Thanks!
Anders
For some reason, my Pi Syncthing node and my desktop have become badly out-of-sync. I thought I would simply delete the files on the pi and let Syncthing rebuild the data on the Pi, but when I try to delete the Pi files, I get “Permission denied”, even though I selected “Ignore Permissions”. I posted on the Syncthing site, and someone asked me for screenshots, after which I have had no response. Wondering if you might help…I followed your tutorials and everything was working great up to the point that “Out-of-Sync” came into the picture. Thanks…
I’d be worried that deleting the files from the Pi would delete them on my desktop, honestly. I haven’t really done much with SyncThing since writing this. I started using a nightly RSync job to sync between my primary Pi server and a secondary backup, but as far as live syncing goes, I’ve kind of fallen back on things like OneDrive. I’d have to pretty much start over at this point to diagnose SyncThing now. One thing you might try though is to delete things from the terminal on the Pi itself via “sudo”. That ought to get you past any permissions issues, but I’d make sure your sync is only going one way so that the files don’t “sync” their way off your desktop as a result. Maybe you could kick the second Pi out of the group, and then add it back in. Definitely check with the SyncThing support groups though. I am by no means a SyncThing expert.