
Note: This post is part of a series. Each post builds on the previous ones. If you are just trying to add one thing to an existing system that was not built following this series, then I cannot promise that these instructions will work for you, although they probably will. If you’ve started from something other than a non-NOOBS Raspbian image, then you’ll probably need to adjust for that.
Please refer to the series Introduction for a list of all the different posts in the series.
Self-Promotion: I have recorded this series as a screencast for Pluralsight:
(http://www.pluralsight.com/courses/raspberry-pi-home-server)
If you have a Pluralsight subscription, please consider watching it. Reading the instructions is one thing, but watching it done demystifies the whole process.
Thank you!
SSH is a simple way to remotely log in to your machine’s command-line interface, but that’s not always the most convenient way to work. There is a wonderful web administration system called Webmin that can handle a lot of the “magic” of system configuration. Webmin can take care of a lot of the tasks you’d normally do from the command line, but in a much friendlier way. In addition, you can add Webmin modules for many of the features we’ll be adding to the Raspberry Pi in this series.
Note that this is totally optional. Webmin doesn’t really give you anything that you can’t already get in other ways, and now that Raspbian images come with VNC remote desktop support built in, you can do pretty well without Webmin. It’s still a pretty convenient “dashboard” to check up on your Pi, though.
It’s pretty easy to install, so let’s get started.
You can’t just install Webmin through apt-get like the other software packages so far because apt-get doesn’t know about Webmin, or at least it doesn’t know about it yet. There are several approaches to a Webmin installation, but I’ve found that the easiest is to simply tell apt-get where to get the packages it needs for Webmin.
apt-get installs software based on a list of internet servers that it uses as sources to download from. You can edit the main apt-get source list, as I did in the previous version of this series, or you can add a new list specifically to support the one package you want to install. This has the advantage of keeping things separated rather than putting all your sources in one file together. This way, you know which sources were added to support which package.
Create a new list file just for webmin like this:
sudo nano /etc/apt/sources.list.d/webmin.list
When the editor appears, add the following line to the empty file:
deb http://download.webmin.com/download/repository sarge contrib
Note: The word “sarge” in the line above is the name of the distribution Webmin was created for. After Sarge was Wheezy, and then Jessie. Debian releases, and by extension Raspbian releases, are all named after Toy Story characters. Sarge is quite an old release at this point, but I guess the Webmin team haven’t needed anything that the Sarge release can’t provide, so they haven’t felt the need to move on yet. That doesn’t mean they’re not maintaining Webmin. At the time of this writing, the latest version in the Sarge repository was from October 3rd, 2016.
Press Ctrl-x,y,enter to exit nano, saving the file. Next you’ll need to import the signing key that verifies the packages coming from the new repository. These next few commands need to be run as the actual root user of the machine. This is the first time this series has done this, so I’ll break it down for you. Type the following to temporarily become the root user:
sudo su
Your command prompt will change, losing all of its color, and becoming more sinister, dark, and dangerous looking like this:
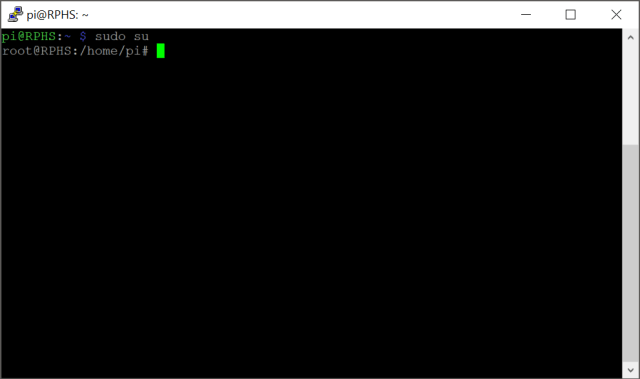
You are now operating as the root user of the machine. The root user can do pretty much anything. Unlike the Windows world, Linux users try to spend as little time in “God-mode” as possible.
Type the following commands to import the Webmin repository’s signing key:
cd /root
wget http://www.webmin.com/jcameron-key.asc
apt-key add jcameron-key.asc
exit
That last “exit” tells the system that you want to stop being the root user now, and go back to being “pi”. The final result should look like this:

Now that you’ve added Webmin’s repository to the list of places apt-get will look for stuff, update the list of available packages again. According to commenter Kevin Liston,
sudo apt-get update
Now that apt-get knows where to get Webmin, you can install it using apt-get.
Note: You may need to install https support for apt get as well. I can’t confirm at this time because I already had it installed on all of my Pis anyway as part of other installations, but it is a good thing to have anyway, so I’ll include it here.
sudo apt-get install apt-transport-https -y
sudo apt-get install webmin -y
Once again, the “-y” will stop apt-get from asking us if we’re sure before continuing.
You can expect this installation to take a little while without providing a lot of feedback. Be patient. When the installation is complete, you can test it by opening a browser, and navigating to the IP address of your server, but specifying https and port 10000 rather than the default http port of 80. If you forget the “https” part, you’ll see a friendly page that offers to redirect you. Either way, you’ll probably also get a warning about the site not having a valid certificate, which of course it doesn’t. Since you own this server, though, it should be safe. Proceed to the page anyway, and you’ll see a login page like this:

Log in as “pi”, and you’ll see the main Webmin interface, which looks like this:
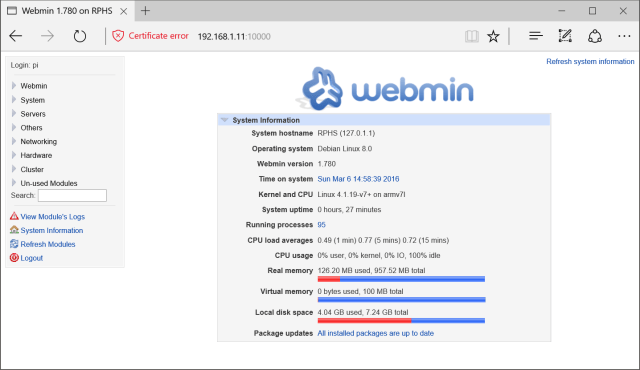
Poke around a bit, and see what Webmin is all about. You can monitor storage and memory usage from here, be notified about updates, apply them, manage user accounts, and a lot more. You can accomplish a lot of the same tasks over SSH, but Webmin can make things a bit more convenient, and is available from any computer on your home network without having to install an SSH client.
Look inside the “Un-used Modules” section to see all the things that Webmin could help you manage, if you had those packages installed. It’s a pretty impressive list.
Wrapping up
You’ve reached another milestone, and I strongly recommend politely shutting down the Raspberry Pi (sudo shutdown –h now), and taking another backup of the SD card or OS partition.

Need to download extra program – sudo apt-get install apt-transport-https
Reason – webmin is now a HTTPS package. Need to tell Raspberry Pi how to access HTTPS.
I’ll update as soon as I can. That change must have happened since I last rebuilt that part.
excellent article..saved me a lot of heartache following those instructables