
Note: This post is part of a series. Each post builds on the previous ones. If you are just trying to add one thing to an existing system that was not built following this series, then I cannot promise that these instructions will work for you, although they probably will. If you’ve started from something other than a non-NOOBS Raspbian image, then you’ll probably need to adjust for that.
Please refer to the series Introduction for a list of all the different posts in the series.
Self-Promotion: I have recorded this series as a screencast for Pluralsight:
(http://www.pluralsight.com/courses/raspberry-pi-home-server)
If you have a Pluralsight subscription, please consider watching it. Reading the instructions is one thing, but watching it done demystifies the whole process.
Thank you!
So far in this series, we’ve set up the Raspberry Pi for remote login via SSH. Sometimes, though, you just want to see a desktop, and that’s not easy when the computer you’re trying to see has no monitor, keyboard, or mouse.
Adding remote desktop abilities to the Raspberry Pi is now trivially easy. Since the introduction of the Pixel desktop, Raspbian images have had a RealVNC server built right in. All you have to do is enable it.
If, for some reason, you don’t like RealVNC, or don’t want to use the latest version of Raspbian, you can still go back and read my instructions for installing X11VNC in the previous version of this post.
Enabling RealVNC
First things first. You can’t remote in to the desktop if it’s not running. For servers, I usually like to leave the desktop disabled, and set the computer to boot to the command line (CLI). This frees up resources for the other programs that I’m running. With the Pi 2 and 3, this becomes less of an issue, and the desktop environment really isn’t that much of a drag. The choice is yours, but I’m going to leave my Pi booting to the desktop for the moment, but I’ll walk you through two different ways to enable the RealVNC server.
Method 1 (if you’re booting to the command-line)
If your Pi is set to boot straight to the desktop, then you can skip this section and move on to Method 2.
If the Pi is still hooked up to a monitor and keyboard, you can do this directly from the Pi itself. Mine is not, so I’ll be connecting via SSH using PuTTY. Either way, log in, get to a command line, and run raspi-config.
Note: With the November 2016 release of Raspbian, SSH is disabled by default. If you want to log in remotely via SSH, make sure you run raspi-config and enable it before removing the monitor and keyboard,
sudo raspi-config
Go to “Advanced Options”, and then select the “VNC” option.

At the prompt, select “Yes” to enable the VNC server. You’ll get an acknowledgement that the server was enabled, which you can dismiss, and then select “Finish” to exit raspi-config.
If you’re reading this section, then I assume your pi boots to the command line, so there’s no desktop to see right now. You need to get the desktop running before there will be anything to look at. Interestingly, the RealVNC server’s background process (or daemon in *nix terms) is running even though the desktop isn’t. If I try to connect the VNC viewer now, it’ll connect just fine, but I’ll see nothing but black.
To start up the desktop, I’ll need to run it manually from the command line like this:
sudo startx
This will start up the desktop, and suspend the command-line window until I shut down the desktop. It should look something like this:
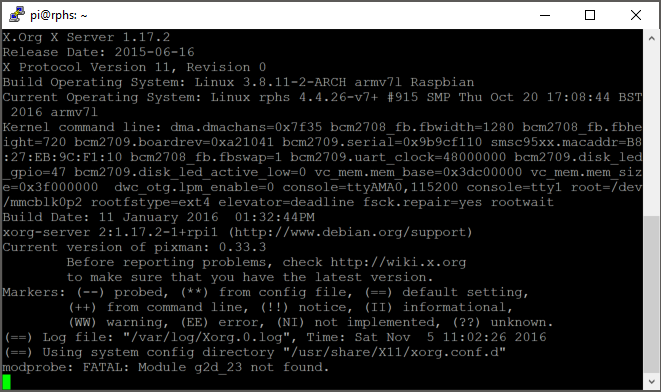
Don’t worry about that “FATAL” message at the bottom. It says that to everyone.
At this point, the desktop should be up and running, and you can skip ahead to the “Connecting a Viewer” section.
Method 2 (if you’re booting to the desktop)
If you’ve left the Pi booting to the desktop, the process is pretty much the same except that we’ll be using the desktop version of raspi-config.
Note: You could still open a terminal window and run the command-line raspi-config as well, if you like.
The RealVNC server can be turned on from the desktop by clicking on the Menu button, then “Preferences”, and then “Raspberry Pi Configuration”.

Go to the “Interfaces” tab, and select “Enable” on the row labelled “VNC”.
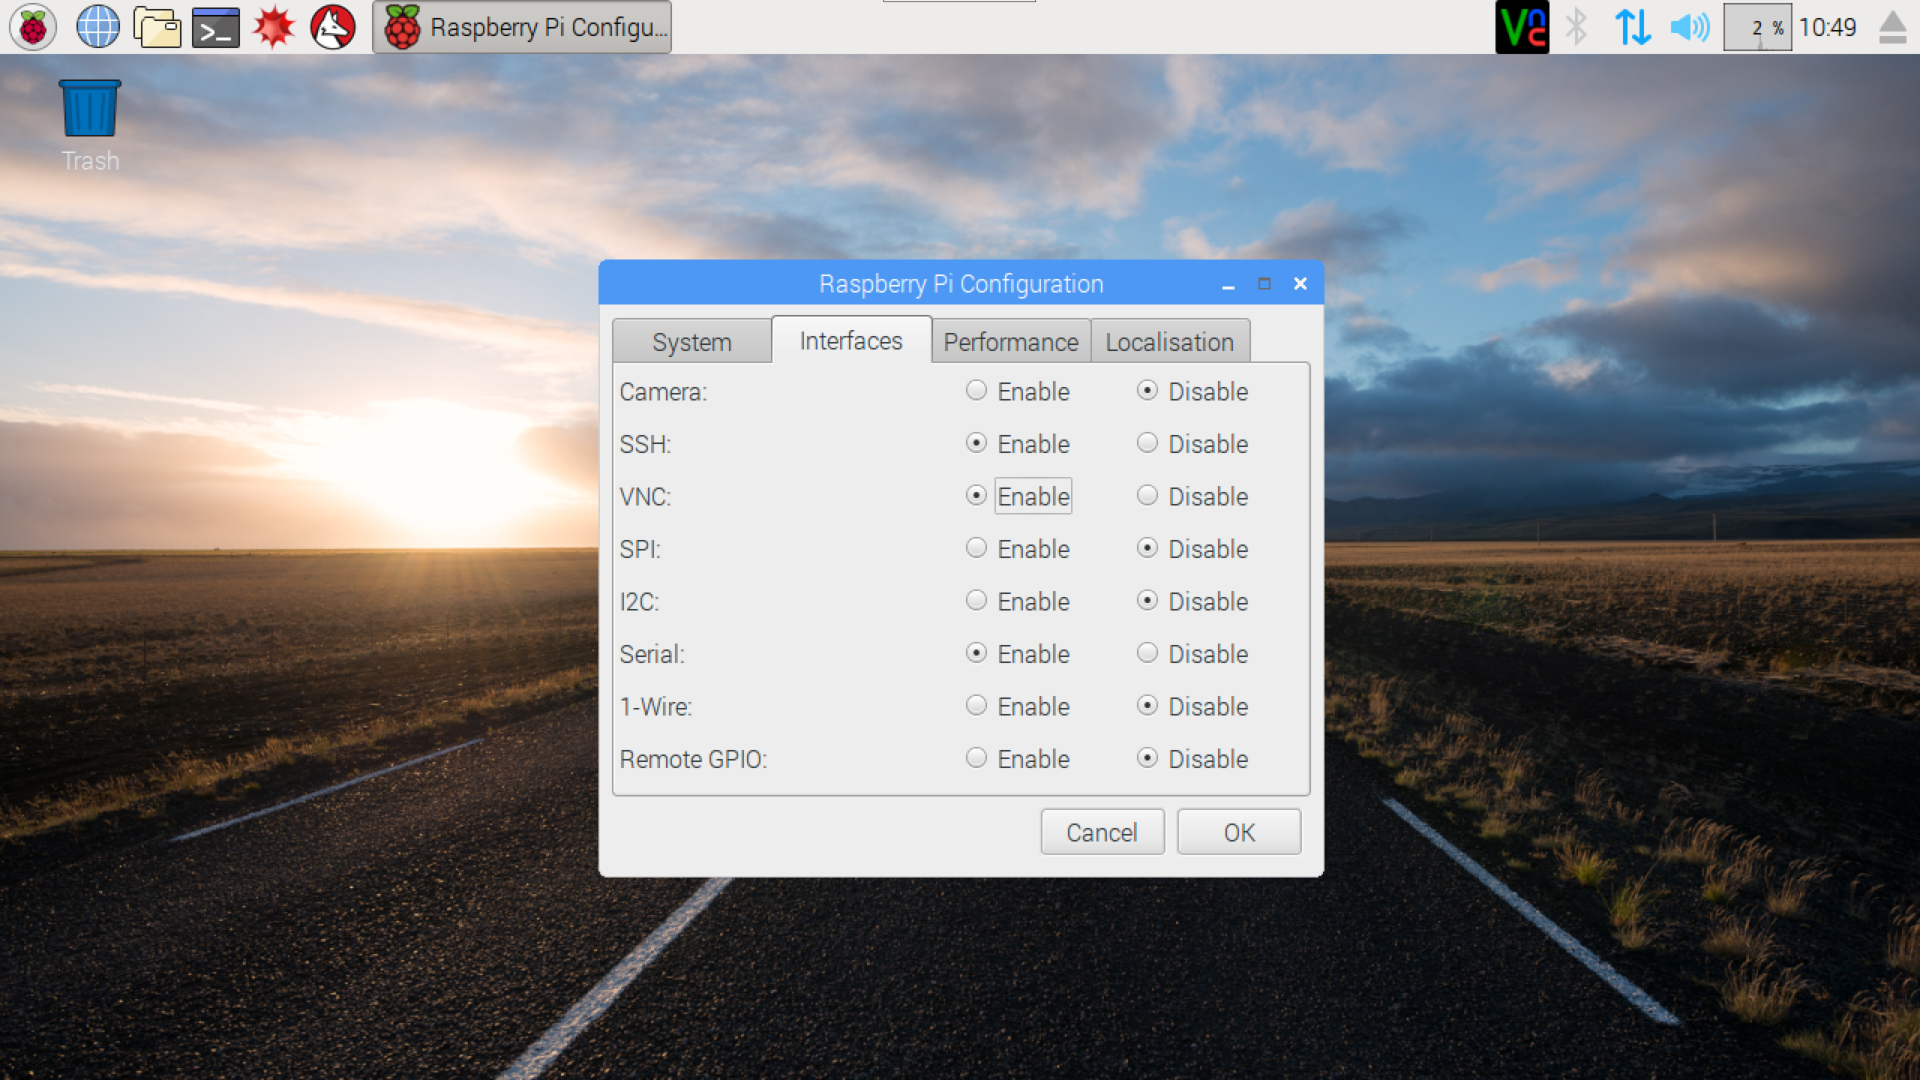
Click OK to exit the configuration tool, and that’s it. Your VNC server is ready to go. Notice that my screenshots above have a “VNC” logo in the upper-right. I’m using VNC to get my screenshots at this point because it’s just easier that way.
Connecting a Viewer
Now that the Pi is set up to share its screen, and the desktop is running, you’ll need a “viewer” in order to see it. Since the Pi is running a RealVNC viewer, the most painless way to connect is with a RealVNC viewer application, which you can download here. Download the version appropriate for your regular computer.
I can’t make observations about all of the platforms the viewer is available for, but I’m a Windows user, and the Windows version of the RealVNC viewer is a portable application that requires no installation. You just download it, run it, and tell it what to connect to.
The first time you run the VNC viewer, you’ll need to give it the address of the Pi. You’ll then be prompted to provide a name and password.
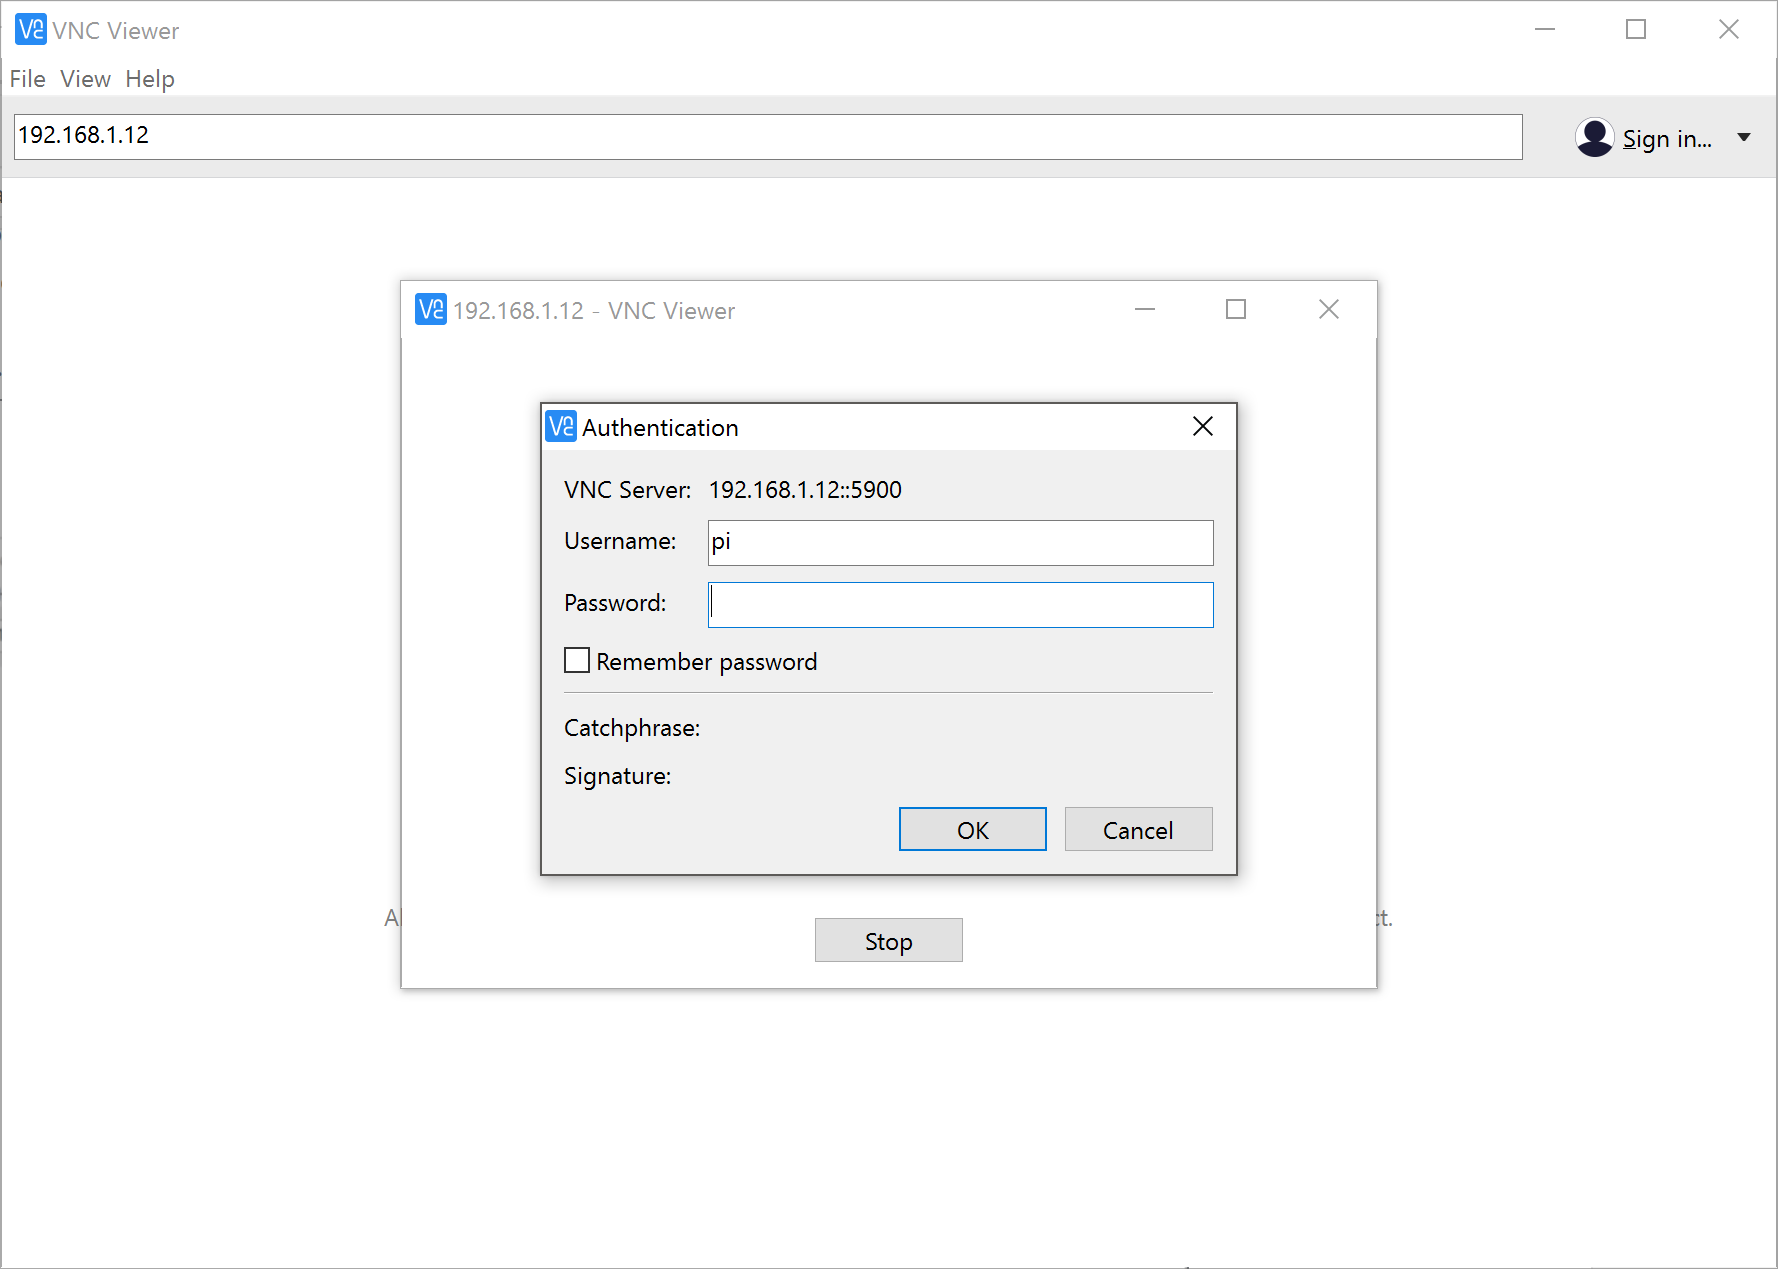
Use the same values you would to log in directly on the Pi, and a new viewer window should open up showing yet another login prompt. This time, it’s the same one you’d see if you were looking at a monitor connected directly to the Pi. It’s a little weird logging in twice, but if you check off “Remember password” in the “Authentication” dialog above, you can skip over the first of these two prompts in the future.

You can resize this window, or tell it to go full-screen. If you move it to a second monitor and go full-screen, you can hardly tell the difference between the VNC window and the real thing.
There’s a slight hiccup, though. If the Raspberry Pi wasn’t plugged into a monitor when it booted up, it will assume that since there’s nothing on the other end of the HDMI connection, you must be using the composite video output, and it will go into a low resolution mode that looks like this:

Cute, but not very useful. Fortunately, we can simply tell the Raspberry Pi what resolution to use, and it won’t try to negotiate the best resolution with the monitor anymore. Edit the main configuration file like this:
sudo nano /boot/config.txt
Look for the line that says “hdmi_force_hotplug=1”, and uncomment it by removing the pound sign from the beginning of the line. Do the same for the “hdmi_group” and “hdmi_mode” lines. You’ll need to provide values for them, though. You can find a pretty exhaustive list on the eLinux site. Pick something that fits comfortable on your primary computer’s monitor. I’m using group 1, mode 4, which is 720p. It gives enough space to read, but fits on my monitor without taking over the whole screen.
Just to prove the point, I made these edits while connected to the too-small virtual desktop, and you can see from this screenshot that the default resolution is waaaay too small to be very useful.

Save your changes and exit nano by pressing Ctrl-X-Y.
Shut down the server, and if you haven’t done so already, unplug it from the monitor. Restart the server by reconnecting the power. Now, when you connect via VNC, the virtual screen will be a much more reasonable size.
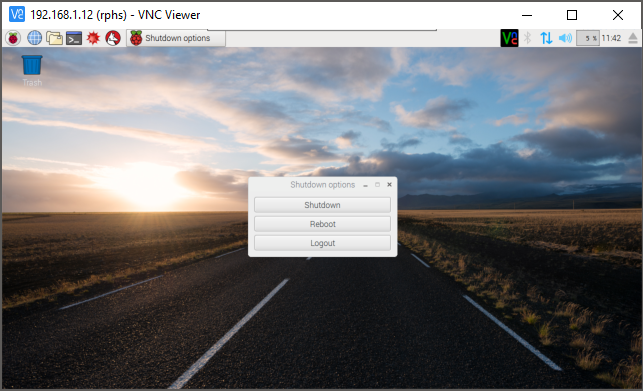
When you’re done, you can log out of the Pi by clicking on the Menu button, then “Shutdown”. Depending on whether you boot to the desktop or the command line, the dialog you get will be slightly different. For those that boot to the desktop, the last option will say “Logout” like this:
Clicking on “Logout” will log you out of the Pi, but won’t close your connection to it. You should see the login prompt again. At this point, it’s safe to just close the VNC viewer window.
If you have your Pi configured to boot to the command line, and had to manually start up the desktop, then the last option on the Shutdown dialog will say “Exit to Command Line” instead.

Clicking on “Exit to command line” may not look like anything has happened because the VNC viewer window will just keep showing that last image of the desktop it ever got, but if you try to interact with anything on the desktop now, you’ll find that it’s no longer listening. You’re can just go ahead and close the VNC viewer window. You’ll notice that your command prompt in your SSH windows has come back now, though.
You can continue using the command line via SSH, or disconnect from there as usual.
Wrapping up
You’ve reached another milestone, and I strongly recommend politely shutting down the Raspberry Pi (sudo shutdown –h now), and taking another backup of the SD card.
What’s next?
In the next post, we’ll add a hard drive, so we have a place to keep stuff.

I love your website. I found it while trying to figure out how to program this new Raspberry Pi 3 of mine. You clearly explain step by step how to program this thing. Very articulate and easy to follow.
Here are some minor updates I’ve found that can help simplify your instructions: 1) In raspi-config, VNC is no longer under Advanced Options. 2) Instead of changing the resolution in /boot/config.txt, you can do it a step earlier when you configure raspi-config in desktop mode while you enable SSH. Easier than looking up codes.
It’s nice that they continue to update the desktop configuration utility. You can do just about everything raspi-config can do now. I did notice that you don’t exactly have the full list to choose from when setting the resolution through the utility. If you want something out of the ordinary, you’ll still need to tweak the settings by hand.
I’ve looked at this some more, and it appears that the resolution button only appears under certain circumstances. I haven’t exhaustively tried to figure out what the conditions are, but on a fresh Raspbian installation that uses the DSI connection on the Pi to connect to a monitor, the Resolution button simply isn’t there. I think the safest bet is to edit the config.txt file, force HDMI, and set the mode from there. That should work in all cases.
Just upgraded my distribution today (still Jessie) and ran into some problems when tried to connect (which was working perfectly before the upgrade)
1. As mentioned, the upgrade turned off the VNC, however the place to turn it on in raspi-config is different now – it is not under “Advanced” but rather under “Interface options”
2. Till now I used TightVNC, however it stopped working (came up with a message about “security types”. I switched to the RealVNC viewer and it works.
After more than a year since my last update, I updated the OS today (still Jessie) and ran into some problems with VNC:
1. As mentioned in the post VNC was turned off, however to turn it in raspi-config you do not go now to “Advanced”, but to “Interface options”.
2. Till now I used TightVNC viewer – it stopped working giving an error regarding “security types” which are not supported. Switched to RealVNC viewer and it works
My VNC kept working just fine, but my samba shares are dead now.