On Wednesday, Aug 16th 2017, a new major Raspbian OS version was released. The “Stretch” release replaced the previous “Jessie” version, and makes a number of changes that may or may not affect you. I’m editing this post as I go through the process of upgrading my servers to the Stretch release, to let you know what I saw.
This will likely be another “live” post for a little while until I’m sure everything is stable, so remember to check back now and then, and please mention any problems you’ve seen in the comments.
Known issues (so far)
This upgrade is not quite ready for everyone to just jump in and do. I’m finding that a few things aren’t working correctly already.
Samba shares
My shares were gone after the upgrade, and even purging and reinstalling Samba couldn’t bring them back. I tried for hours to figure out what the problem was before deciding to go whole hog and do a dist-upgrade, which I normally don’t recommend. A lot of things can go wrong with a dist-upgrade since you’ll sometimes get newer versions of packages that aren’t quite ready for the real world. In this case, it worked. My shares are back online. DO NOT try this without a full backup. You’ve been warned.
Network UPS Tools (NUT)
The first time I tried the upgrade process, I got a rather troubling error message at the end saying that there were errors while processing “nut-client”, “nut-server”, and “nut”, so I gave apt-get upgrade a second pass just to make sure everything else was updated properly. Only these three packages had failed to upgrade, and it appears it’s because the nut-client service failed to restart. This is because the configuration files were overwritten by the upgrade, and didn’t have any useful information in them. After I restored my configuration settings, I was able to complete the installation. See below for more details.
Take a Backup
I should even have to tell regular readers to do this. We’re about to make major changes to the OS itself. You should shut down the Pi, and take a backup of the SD card before going any further. If you’re booting from a hard drive, then you’ll want to attach that to another computer and backup the root partition as well. After all, that’s where most of your stuff actually lives.
Consider upgrading from the desktop
If you can boot to the desktop, then I’d consider doing that. There are a couple times during the upgrade process where I found it convenient to open a second terminal window to examine something the upgrade process was going to change. If you connect through SSH, then you can use multiple sessions to achieve the same effect. If you’re running Raspbian Lite, and only use a directly-attached monitor and keyboard, then you may want to keep a note pad nearby in case you need to take note of proposed config file changes so you can restore your customizations afterward.
Update APT sources
To get the new software packages, APT will need to know where they live first. All you need to do is edit the two “source” files to point to the new “stretch” repositories.
sudo nano /etc/apt/sources.list
Change all instances of “jessie” to “stretch” and save the file. You can do this by hand, or you can let nano do some of the work for you. To do a search and replace, press ctrl-\. That’s the control key and the backslash. You’ll be prompted for the text to search for (jessie), and what to replace it with (stretch). If you haven’t done much to these files, then you should only find two matches, one on the first line, and one on the last line, commented out. Press “Y” for each match, or “A” to replace them all at once.
When you’re done, close the file, saving your changes (ctrl-x, y, enter). Next, do the same thing again, for a second file.
sudo nano /etc/apt/sources.list.d/raspi.list
Change all the “jessie”s to “stretch”es, and save the file. Finally, do a standard update/upgrade.
sudo apt-get update
sudo apt-get upgrade
What to expect during the upgrade
This is a pretty massive update, so you can expect this to take a while. Don’t just leave and come back later though because you’ll be prompted for answers several times during the upgrade process. The first prompt will be to approve the proposed changes, just like every time you do an upgrade, but the list will be huge. I’m talking hundreds and hundreds of packages have updates. You’ll also be prompted when configuration files have updates. I got prompted for changes to the following files
- /etc/skel/.bashrc
I’ve never made any changes to this file by hand, so I just took the new version by pressing “y” and then “enter” when prompted. Note, these kinds of changes will default to “n”, so fight the urge to just hit enter like you’re used to. If you’ve made any customizations to this file, then you might consider opening a copy of the file in another window, and then reapplying your changes by hand when the update is complete. See the dhcpcd.conf step below for details. - /etc/login.defs
I took the new version of this file as well since I’ve never touched it myself. - Graphical prompt for the keyboard language
I let this one “guess”, which is the default option. - /etc/dhcpcd.conf
Now this IS a file that I’ve messed with. It’s how you set up static IP addresses on the Pi these days, so I first used the “D” option to examine the differences between the proposed new version and what I currently have. There were changes to things other than defaults; things I had modified by hand. I opted to open a copy of the file in nano from a second command prompt, and then hand apply my customizations when the upgrade completed. Press “y” to take the new version of the file. Don’t forget to come back and apply your customizations later on, though. - /etc/lightdm/lightdm-gtk-greeter.conf
Another file I haven’t touched by hand. I took the new version. - /etc/nut/nut.conf and /etc/nut/upsmon.conf’
I’ve definitely customized these as part of installing the battery backup (see Network UPS Tools), but the customizations aren’t that extensive. I opened a couple new terminal windows, opened the files in nano, and then took the new version of the file (“Y” option). The installation will fail to complete, but once we restore the customizations to these files, you’ll be able to pick back up and complete the process.- /etc/nut/ups.conf
The part you’re interested in is at the bottom, and it’s where you set up the driver for your particular UPS. Mine looks like this:[RPHS] driver = usbhid-ups port = auto desc = "CyberPower SX550G"
- /etc/nut/upsmon.conf files.
This sets up the UPS monitor that’s in charge of actually shutting down the Pi when the power goes out. There are a few sections you’ll need here.
The first is the MONITOR section. Mine looks like this:MONITOR rphs@localhost 1 upsmon NOTMYREALPASSWORD master
The second section is the NOTIFYCMD. You will only have touched this part if you set up email notifications for power events. Mine looks like this:
NOTIFYCMD /etc/nut/upssched-cmd.sh
Finally, there’s the NOTIFYFLAG section. This tells NUT which power events you’re interested in getting notifications for. Not just email notifications though, this includes “wall” messages. Mine looks like this:
NOTIFYFLAG ONLINE SYSLOG+WALL+EXEC
NOTIFYFLAG ONBATT SYSLOG+WALL+EXEC
NOTIFYFLAG LOWBATT SYSLOG+WALL+EXEC
# NOTIFYFLAG FSD SYSLOG+WALL
# NOTIFYFLAG COMMOK SYSLOG+WALL
# NOTIFYFLAG COMMBAD SYSLOG+WALL
# NOTIFYFLAG SHUTDOWN SYSLOG+WALL
# NOTIFYFLAG REPLBATT SYSLOG+WALL
# NOTIFYFLAG NOCOMM SYSLOG+WALL
# NOTIFYFLAG NOPARENT SYSLOG+WALL
It’s not important that your configuration looks like mine, and it probably won’t. The important thing is that you’re writing down, saving off, or opening a second window with your customizations so that we can restore them later on.
- /etc/nut/ups.conf
- Graphical prompt for the “/etc/apt/apt.coasdfnf.d/50unattended-upgrades” file.
I haven’t touched this one either, so I took the new version.
Removing PulseAudio
The Jessie release of Raspbian used the PulseAudio library for Bluetooth audio. If you’re not using it, you can safely remove it.
sudo apt-get -y purge pulseaudio*
Restoring NUT
I decided to take the new version of the configuration files simply because I don’t know what else has changed in the newer versions, and my own customizations aren’t that extensive. Taking the new files will cause the upgrade to fail because part of the upgrade involves restarting the services, but the new configuration files are missing all of the vital information about your UPS. We’ll restore these files one at a time.
/etc/nut/ups.conf
Scroll to the bottom and restore your UPS information from above.
sudo nano /etc/nut/upsmon.conf
Restore the MONITOR, NOTIFYCMD, and NOTIFYFLAG sections from above. Then, we’re ready to take another shot at completing the NUT upgrade. Pick up where we left off with the following command.
sudo dpkg --configure -a
Apt-get is just a polite shell around the dpkg command which is really doing all the work behind the scenes. This command tells dpkg to finish configuring any outstanding packages. You’ll get prompted again to keep or overwrite your files. We’ve already overwritten them once, and then reapplied our customizations, so this time, choose the default option of “N” to keep your configuration files the way they are now, and the installation should complete successfully this time.
Restoring Samba
As I mentioned above, my Samba shares stopped working after the upgrade, and the only thing that seems to have helped bring them back to life is this:
sudo apt-get dist-upgrade
Normally, I’d say don’t do this. I used to do it all the time until I got burned. dist-upgrades are the bleeding edge of upgrades. Not everything has been tested to make sure it gets along well. Most of the time you’re probably okay, but it’s that one time in ten that takes your machine down that you can avoid by only doing normal upgrades.
Checking one last time
Just to be sure nothing got left behind, I did another apt-get upgrade. I noticed a note about packages that were no longer needed. I decided to leave them alone for now. There is also an extensive list of packages that have been “kept back”. You can force these packages to update with a “sudo apt-get dist-upgrade”, but I advise against that. You can read more about it here, but the practical explanation is that dist-upgrade can leave your system pretty broken.
You’re welcome to try it if you’re feeling daring, but I’ve had bad luck with it in the past and generally avoid it. There’s definitely no way you should even consider this without a fresh backup. You’ve been warned.
Changes in Stretch
One that I’ve read about is a change to the way network interfaces are named. From what I’ve read, this only affects new installations, and upgrades will retain their previous naming scheme, so an upgrade should be safe. Previously, you could count on the Pi’s Ethernet port being named “eth0”. Much like hard drives though, if you happened to have more than one Ethernet port, there is the possibility that their names could end up in a different order on any given day. That’s a pretty rare case though. Most Pi’s are only ever going to have the one port that they came with.
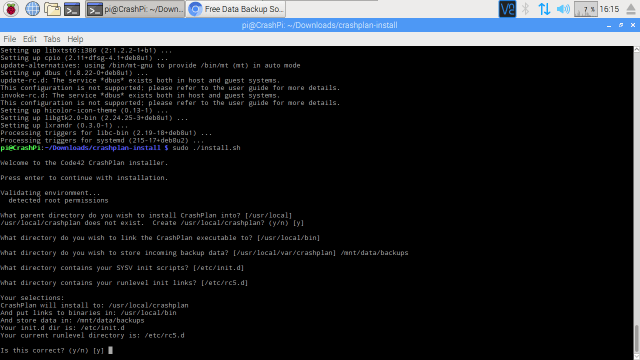
 Return to your terminal window, which should still be emulating an x86 execution environment, and navigate to the new “crashplan-install” folder. From there, run the CrashPlan installation script.